Classic Car DIY Rust Teatment
7 min readShare this
The modern cars we drive today are all well treated against rust with some manufacturers zinc coating certain parts as well as having wax injected box sections etc and this enables the car makersto offer very realistic warranties against panel perforation.
However the cars we now regard as classics had no such body protection and in many cases after a few years use from new the dreaded rust bug had taken hold and expensive repairs would follow.
We all want our classics to look good and not have the unsightly tell tale signs of rust appearing in various locations especially after an expensive restoration and with a little help from the specific rust prevention products on the market in most cases this can be achieved.
While the choice of body protection product is up to one’s preference probably for the DIY market the name of Waxoyl springs into mind and is readily available in black or clear colouring from many motor factors and this particular product is one that I have used on a selection of vehicles for many years with good success.
However, I have been asked to write about the rust prevention of one specific car the ever popular MGB/GT but many of my suggestions can apply to other classic cars as well.
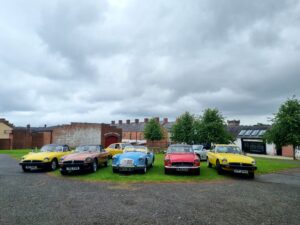
The MGB, you either like or dislike them and I happen to fall into the former category driving one as everyday transport over 50 years ago and still driving them today as a classic. The MGB body shell was very strongly made and some may say over engineered and because of this it changed little throughout the life span of the car but it was no stranger to the dreaded rust bug.
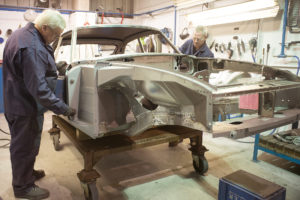
The sill structures being a major strength component of the car are very prone to internal rusting, the lower part of the front wing rusts through from the inside due to an accumulation of dirt that finds its way past the splash panel, also rusting will occur around the headlight if this area is not kept clean and the inner front wing strengthening box section thats flat on the top rusts through.
The rear spring mountings area can be subject to rust, around the rear wheel arch outer panel also the inner arch, floor pans, fuel tank rusting through from the top, the GT tailgate rusting through from the inside towards the lower edge and also the lower part of the GT windscreen pillars are prone to rusting and of course you have the door bottoms on both cars, to mention but some of the areas.
If you are reading this and were thinking of buying an MGB please don’t be put off, this car is no worse or better re the rust bug than many others in it’s era. Parts supplies for most MGs are excellent especially the MGB and there are great restoration companies out there that can attend to all the problem areas mentioned.
There is a great selection of tin sizes for the Waxoyl product but I would recommend buying the gallon (5 litre) tin as this can be cost effective and providing the cap is secure after usethe remaining product will keep indefinitely also on this tin there are very good instructions for applying the product as suggested by the manufacturer with the use of their own application equipment which is readily available.
Naturally, before applying any rust preventive treatment to the underside of your car it must be clean and dry and remember this product will not cure existing rust, if there are rusty sections on your car have them dealt with prior to treating it. Light surface rust can be wire brushed and neutralised if necessary with a suitable product and do not spray over bad scaling rust as this is a waste of time.
Before starting any job make sure you have everything you need, there’s nothing worse than finding you are short of an item or material half way through, you will need the product and applicators, white spirit, a drill, suitably sized steel bit, hole plugs, ramps or hydraulic jack and axle stands, wheel chocks, etc.
Under no circumstances go below the car relying on the jack only and with health and safety already on your mind you will also require a good quality fine particle mask, goggles, suitable overalls, disposable gloves and something to cover your hair.
Noel, MG Owners’ Club Northern Ireland
TIP: I use hair hats/nets as supplied in a food processing plant they’re brilliant for this alternative use, yes dressed in this gear I’m not a pretty sight but family are used to it by now.
Before applying any under body protection wax mask off the rubber brake and clutch slave cylinder hoses, discs brakes and any other parts/areas that you don’t want treated, any overspray on the exhaust system can be easily removed with an old rag before the product dries.
If you are using the manufacturers application equipment follow their instructions on their leaflets or tins, however I prefer to use a small compressor with various associated spray appliances capable of dealing with the Waxoyl product. The pressures I use are 50 PSI for the accessible areas and 80+ PSI for the box sections, sills, chassis legs etc (i.e. all closed sections).
TIP: I add about 15% of fresh engine oil to the Waxoyl when spraying the closed sections and I believe this helps the product to flow and seep better into the concealed seams.
TIP: Leave the doors, bonnet and boot lid open when spraying as if everything is kept closed you will be surprised how much Waxoyl vapour gets trapped leaving a sticky residue on all surfaces.
TIP: If using a compressor heat the air entering the compressor and this hotter air helps the product to flow better. Pick a warm day or warm environment placing the tin of Waxoyl into a basin of very warm water and regularly shake the tin getting the product fully mixed and keep the water as warm as possible which helps the application of the product.
Using the numerous manufacturers drain holes in the box/sill sections apply the Waxoyl into same using extension tubes if necessary getting to all the extremities of the box sections etc., if there are any locations out of reach drill a small access hole and plug when finished.
After all the enclosed sections have been treated coat the complete underside of the car paying special attention to the vulnerable areas like the battery carriers, rear valance, top of the fuel tank etc. With the front wings splash panels removed treat these closed sections well paying particular attention to the lower wing areas also around the headlights and the flat inner wing box sections.
TIP: When refitting splash panels make sure the rubber to wing sealing strip is a good tight fit especially at the upper end above the box section thus preventing the entry of road dirt into the wing cavity.
The rear wing to arches area can be treated from inside the boot and with an extension the lower rear wing section behind the doors can also be treated from this area.
TIP: I regularly apply Comma spray grease to these areas and this product has the ability to penetrate all the seams and leaves a permanent coating over the metal and will be seen seeping out of the outer sill section.
To get a full coating over all the vulnerable internal sill sections can be very difficult but access can be gained from under the car, the outer sill drain holes, behind the front wing splash panel and if you have threshold covers fitted remove them and drill several spaced holes under same into the sills and apply plenty of the rust proofing product, when finished tape over the access holes and this will allow the threshold plates to sit back flat.
To treat the inner sections of the car door properly entails removing the door trim although part access can be gained through the drain holes, frame adjusting plugs etc but at all times make sure you do not block any of the drain holes in the car.
While this article covers the main areas of the car, attention should also be given to the inner edges of the roadster and GT boot lids together with those of the bonnet, door posts, hinge and front wing edges in this area, apply a little logic, anywhere water or damp accumulates rust will start.
Allow a day to carry out this complete treatment and while all that time may not be spent on the car you will have to tidy up and flush out the equipment, etc., which can be easily done with white spirit. If you have any excess product on the exterior body work this can be removed with a dry cloth before it dries or any time later with a little white spirit.
Leave the car for at least a week/ten days to let the product cure before using the vehicle in wet conditions, it also helps to save the garage floor by placing old newspapers under the car to catch any excess dripping material.
There are companies who would carry out this job for you but it’s nice to say that it was done by yourself and all vulnerable areas have been well treated and hopefully the car will last you rust free for many years to come.
Noel, MG Owners’ Club Northern Ireland